
Rare Photo of two Dinks preparing for their trip to Canada
"[Character] wrote a popular zombie survival guide that was just full of bad advice."
When driving on the Death Road, some players may have a hard time winning that game. It can be difficult to find the right locations to loot, weapons to gather, and knowledge of when to fight and when to flee. Death Road to Canada gameplay is somewhat similar to that of The Organ Trail where players must find resources and weapons to progress through the game. The longer that players travel on the Death Road the harder it becomes (though granted they can also get better weapons and training for their characters). This Guide merely aims to provide an order of progression through the Death Road's many dangers, dinks, and very comedic moments.
If you are unsure about what perks and traits work together you can see the perks and traits pages to get a general idea when creating/choosing a character. For a new player it is recommend to start off playing death road normal mode or familiar characters mode. If you're looking for a greater experience and/or are already experienced in the game then you could recommend rare characters mode, long winding road mode, or short trip to heck mode as a start.
Starting Off[]
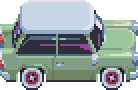
At the beginning of the game characters start off in a Old Car (Starter) or if they have the car nut perk they can start off with a better car*. Characters also start off by default with 8 food and 100 gas for most game modes except for 4 jerks mode/4 jerk Extreme and O*P*P mode. When it comes to resources food and gas share an equal importance. Low food can lead to massive moral lose and losing due to despairing. Low gas can lead to having to walk (which have more negative events). Medical is of secondary importance to food and gas, but is still necessary if your party has low health. Ammo is typically of least importance but is still needed if your group has weak weapons or low strength/fitness. Before starting on the death road it is important to read some of the starting hints to get a general idea of what to do.
| Sprite | Name | Speed | Durability | Gas cost | Repair Level |
|---|---|---|---|---|---|
| Old Car (Starter) |  |
Chassis: 5
Engine: 15-20 / 20 |
 |
 | |
| Station Wagon* | |
Chassis: 5
Engine: 15-20 / 20 |
|
| |
| Muscle* |  |
Chassis: 5
Engine: 10 / 10 |
 |
 | |
| Hybrid* | |
Chassis: 3
Engine: 12-15 / 15 |
 |
 | |
| Classic* | |
Chassis: 8
Engine: 15 / 15 |
|
| |
| Bug* | |
Chassis: 3
Engine: 12-15 / 15 |
 |
| |
| Hotrod* | |
Chassis: 3
Engine: 12-15 / 15 |
|
|


Beginning Weapons[]
Most characters when they start the death road will get mostly shoddy weapons to start with, some might get no weapons and are easily vulnerable to zombies; as standard unarmed attacks does no damage to zombies, unless they have a claw attack, or perks like Big Bruiser or Martial Artist. Some perks like trademark weapon, gun collector, etc. can allow a character to start off with a better weapons, it is important however to give characters high strength/fitness when using melee weapons and high shooting when using ranged weapons to maximize the effectiveness of these weapons.
| Punch | |||
|---|---|---|---|
| Weapon | Notes | ||
Used by All survivors by default
Has the lowest stats of any weapon.
| |||
0 - WEAPON_PUNCH
| |||
| Stats | Demonstration Video | ||
| Power | 0 | ||
| Cooldown | 0 seconds | ||
| Knockback | 0 | ||
| Extra Hits | 0 | ||
| Break Scale | n/a | ||
| Tier | {{{Tier}}} | ||
| Boxing | |||
|---|---|---|---|
| Weapon | Notes | ||
Used by Survivors with Big Bruiser perk
N/A
| |||
3 - WEAPON_BOXING
| |||
| Stats | Demonstration Video | ||
| Power | 1 | ||
| Cooldown | 0 seconds | ||
| Knockback | 0.5 | ||
| Extra Hits | 0 | ||
| Break Scale | n/a | ||
| Tier | {{{Tier}}} | ||
| Kung Fu | |||
|---|---|---|---|
| Weapon | Notes | ||
|
If rescued, Bryce Lu can teach Kung Fu to one survivor.
| |||
4 - WEAPON_KUNG
| |||
| Stats | Demonstration Video | ||
| Power | 1 | ||
| Cooldown | 0 seconds | ||
| Knockback | 1 | ||
| Extra Hits | 1 (100%) | ||
| Break Scale | n/a | ||
| Tier | {{{Tier}}} | ||
Melee Weapons (Without Perk Bonus)[]
| Broomstick | |||
|---|---|---|---|
| Weapon | Notes | ||
Survivors may randomly start with this weapon.
| |||
94 - WEAPON_BROOM
| |||
| Stats | Trading | ||
| Power | 0.2 | Vendors | None |
| Cooldown | 0.6 seconds | Sell Price | Cannot be sold |
| Knockback | 1 | Looting | |
| Extra Hits | +2 (100%) | Locations | House, Apartment, Closet |
| Break Scale | 2% | Events | None |
| Tier | {{{Tier}}} | ||
| Cane | |||
|---|---|---|---|
| Weapon | Notes | ||
Survivors may randomly start with this weapon.
| |||
27 - WEAPON_CANE
| |||
| Stats | Trading | ||
| Power | 1 | Vendors | None |
| Cooldown | 0.85 seconds | Sell Price | Cannot be sold |
| Knockback | 1 | Looting | |
| Extra Hits | +0 | Locations | Hospital Raid, Medical Clinic |
| Break Scale | 2% | Events | None |
| Tier | {{{Tier}}} | ||
| Flashlight | |||
|---|---|---|---|
| Weapon | Notes | ||
Provides light in dark locations. Two flashlights are found in the party's inventory. Handy Tools Salesman will give the party a flashlight if they have no food.
| |||
103 - WEAPON_FLASHLIGHT
| |||
| Stats | Trading | ||
| Power | 0.7 | Vendors | Handy Tools Salesman (1 food) |
| Cooldown | 0 seconds | Sell Price | Cannot be sold |
| Knockback | 0.25 | Looting | |
| Extra Hits | +0 | Locations | None |
| Break Scale | 2% | Events | None |
| Tier | {{{Tier}}} | ||
| Frying Pan | |||
|---|---|---|---|
| Weapon | Notes | ||
Survivors may randomly start with this weapon.
| |||
28 - WEAPON_FRYING
| |||
| Stats | Trading | ||
| Power | 1 | Vendors | None |
| Cooldown | 0.9 seconds | Sell Price | Cannot be sold |
| Knockback | 1 | Looting | |
| Extra Hits | +0 | Locations | Grocery Store, Restaurant, Kitchen |
| Break Scale | Unbreakable | Events | None |
| Tier | {{{Tier}}} | ||
| Kitchen Knife | |||
|---|---|---|---|
| Weapon | Notes | ||
Survivors may randomly start with this weapon.
| |||
12 - WEAPON_KITCH
| |||
| Stats | Trading | ||
| Power | 0.75 | Vendors | None |
| Cooldown | 0.5 seconds | Sell Price | Cannot be sold |
| Knockback | 0.25 | Looting | |
| Extra Hits | +0 | Locations | Grocery Store, Kitchen, Restaurant |
| Break Scale | 1% | Events | None |
| Tier | {{{Tier}}} | ||
| Knitting Needle | |||
|---|---|---|---|
| Weapon | Notes | ||
Survivors may randomly start with this weapon.
| |||
116 - WEAPON_KNITTING
| |||
| Stats | Trading | ||
| Power | 0.5 | Vendors | None |
| Cooldown | 0 seconds | Sell Price | Cannot be sold |
| Knockback | 0 | Looting | |
| Extra Hits | +0 | Locations | House, Apartment |
| Break Scale | 5% | Events | None |
| Tier | {{{Tier}}} | ||
| Mop | |||
|---|---|---|---|
| Weapon | Notes | ||
Survivors may randomly start with this weapon.
| |||
95 - WEAPON_MOP
| |||
| Stats | Trading | ||
| Power | 0.6 | Vendors | None |
| Cooldown | 1.5 seconds | Sell Price | Cannot be sold |
| Knockback | 1 | Looting | |
| Extra Hits | +1 (100%) | Locations | House, Apartment, Closet |
| Break Scale | 2% | Events | None |
| Tier | {{{Tier}}} | ||
| Piece of Wood | |||
|---|---|---|---|
| Weapon | Notes | ||
Obtained by breaking wooden furniture (sofas, cupboards, etc). Survivors may randomly start with this weapon.
| |||
30 - WEAPON_WOOD
| |||
| Stats | Trading | ||
| Power | 0.75 | Vendors | None |
| Cooldown | 0.86 seconds | Sell Price | Cannot be sold |
| Knockback | 1 | Looting | |
| Extra Hits | +0 | Locations | House, Apartment, Various |
| Break Scale | 10% | Events | None |
| Tier | {{{Tier}}} | ||
| Re-bar | |||
|---|---|---|---|
| Weapon | Notes | ||
Survivors may randomly start with this weapon.
| |||
92 - WEAPON_REBAR
| |||
| Stats | Trading | ||
| Power | 0.5 | Vendors | None |
| Cooldown | 0.5 seconds | Sell Price | Cannot be sold |
| Knockback | 1 | Looting | |
| Extra Hits | +0 | Locations | Junkyard |
| Break Scale | Unbreakable | Events | Weapon Stealing Bandits |
| Tier | {{{Tier}}} | ||
| Umbrella | |||
|---|---|---|---|
| Weapon | Notes | ||
Reduces morale loss during the Horrible Weather event. Survivors may randomly start with this weapon.
| |||
43 - WEAPON_UMBRELLA
| |||
| Stats | Trading | ||
| Power | 0.5 | Vendors | None |
| Cooldown | 0.7 seconds | Sell Price | Cannot be sold |
| Knockback | 1.5 | Looting | |
| Extra Hits | +1 (100%) | Locations | Umbrella Shop, House |
| Break Scale | 2% | Events | None |
| Tier | {{{Tier}}} | ||
Melee Weapons (With Perk/Trait Bonus)[]
| Aluminum Bat | |||
|---|---|---|---|
| Weapon | Notes | ||
Survivors with Trademark Weapon may start with this weapon.
| |||
34 - WEAPON_ALUMINUM
| |||
| Stats | Trading | ||
| Power | 1 | Vendors | Fire Sale Trader (6 food) |
| Cooldown | 0.75 seconds | Sell Price | 1 food (2 food with Top Seller) |
| Knockback | 2 | Looting | |
| Extra Hits | +0 | Locations | Sporting Goods Store, Athletic Store |
| Break Scale | Unbreakable | Events | None |
| Tier | {{{Tier}}} | ||
| Baseball Bat | |||
|---|---|---|---|
| Weapon | Notes | ||
Athletes may start with this weapon. Roller Derby Girl starts with this weapon.
| |||
8 - WEAPON_BASEBALL
| |||
| Stats | Trading | ||
| Power | 1 | Vendors | None |
| Cooldown | 0.75 seconds | Sell Price | Cannot be sold |
| Knockback | 2 | Looting | |
| Extra Hits | +0 | Locations | Sporting Goods Store, Athletic Store |
| Break Scale | 2% | Events | Kinda Pushy |
| Tier | {{{Tier}}} | ||
| Bonesaw | |||
|---|---|---|---|
| Weapon | Notes | ||
Survivors with Trademark Weapon may start with this weapon.
| |||
201 - WEAPON_BONESAW
| |||
| Stats | Trading | ||
| Power | 2 | Vendors | None |
| Cooldown | 1.2 seconds | Sell Price | Cannot be sold |
| Knockback | 0.4 | Looting | |
| Extra Hits | +1 (100%) | Locations | Hospital Raid, Medical Clinic |
| Break Scale | Unbreakable | Events | None |
| Tier | {{{Tier}}} | ||
| Cricket Bat | |||
|---|---|---|---|
| Weapon | Notes | ||
Athletes may start with this weapon.
| |||
33 - WEAPON_CRICKET
| |||
| Stats | Trading | ||
| Power | 1.1 | Vendors | None |
| Cooldown | 0.7 seconds | Sell Price | Cannot be sold |
| Knockback | 2.2 | Looting | |
| Extra Hits | +0 | Locations | Sporting Goods Store, Athletic Store |
| Break Scale | 1% | Events | None |
| Tier | {{{Tier}}} | ||
| Crowbar | |||
|---|---|---|---|
| Weapon | Notes | ||
Gordo and Gungineers start with this weapon.
| |||
31 - WEAPON_CROWBAR
| |||
| Stats | Trading | ||
| Power | 1.5 | Vendors | None |
| Cooldown | 1.1 seconds | Sell Price | Cannot be sold |
| Knockback | 2 | Looting | |
| Extra Hits | +0 | Locations | Junkyard, Factory |
| Break Scale | Unbreakable | Events | None |
| Tier | {{{Tier}}} | ||
| Electric Guitar | |||
|---|---|---|---|
| Weapon | Notes | ||
Survivors with Trademark Weapon may start with this weapon.
| |||
99 - WEAPON_GUITAR
| |||
| Stats | Trading | ||
| Power | 1.5 | Vendors | Axe Salesman (10 food) |
| Cooldown | 0.86 seconds | Sell Price | 2 food (3 food with Top Seller) |
| Knockback | 1.5 | Looting | |
| Extra Hits | +0 | Locations | NUTZ "4" TOYS |
| Break Scale | Unbreakable | Events | None |
| Tier | {{{Tier}}} | ||
| Golf Club | |||
|---|---|---|---|
| Weapon | Notes | ||
Athletes may start with this weapon.
| |||
36 - WEAPON_GOLF
| |||
| Stats | Trading | ||
| Power | 0.5 | Vendors | None |
| Cooldown | 0.55 seconds | Sell Price | Cannot be sold |
| Knockback | 2 | Looting | |
| Extra Hits | +0 | Locations | Sporting Goods Store, Athletic Store, Big Office Complex, Office Building |
| Break Scale | 2% | Events | Driving Range Last Stand |
| Tier | {{{Tier}}} | ||
| Hatchet | |||
|---|---|---|---|
| Weapon | Notes | ||
Fighters start with this weapon.
| |||
15 - WEAPON_HATCHET
| |||
| Stats | Trading | ||
| Power | 1.25 | Vendors | Axe Merchant (3 food) |
| Cooldown | 0.75 seconds | Sell Price | Cannot be sold |
| Knockback | 0.5 | Looting | |
| Extra Hits | +1 (10%) | Locations | House, Apartment, Cabin, Camp Supplies Shop |
| Break Scale | Unbreakable | Events | None |
| Tier | {{{Tier}}} | ||
| Hockey Stick | |||
|---|---|---|---|
| Weapon | Notes | ||
Athletes may start with this weapon. Axe Merchant will give the party a hockey stick if they have less than 3 food.
| |||
45 - WEAPON_HOCKEY
| |||
| Stats | Trading | ||
| Power | 0.75 | Vendors | None |
| Cooldown | 0.65 seconds | Sell Price | Cannot be sold |
| Knockback | 2 | Looting | |
| Extra Hits | +0 | Locations | Sporting Goods Store, Athletic Store |
| Break Scale | 2% | Events | None |
| Tier | {{{Tier}}} | ||
| Hot Poker | |||
|---|---|---|---|
| Weapon | Notes | ||
Survivors with Trademark Weapon may start with this weapon. Ignites zombies. Causes fatigue at half the normal rate.
| |||
155 - WEAPON_HOTPOKER
| |||
| Stats | Trading | ||
| Power | 0.3 | Vendors | None |
| Cooldown | 0.3 seconds | Sell Price | 6 food (9 food with Top Seller) |
| Knockback | 0.5 | Looting | |
| Extra Hits | +0 | Locations | Burning House |
| Break Scale | Unbreakable | Events | None |
| Tier | {{{Tier}}} | ||
| Knight Sword | |||
|---|---|---|---|
| Weapon | Notes | ||
Blade Master will give the party a knight sword for free with a full charge COOL IT. Knight starts with this weapon. Survivors with Trademark Weapon may start with this weapons.
| |||
39 - WEAPON_KNIGHT
| |||
| Stats | Trading | ||
| Power | 2.5 | Vendors | Blade Master (20 food), Medium Weapons Knight (15 food) |
| Cooldown | 1.3 seconds | Sell Price | 5 food (8 food with Top Seller) |
| Knockback | 1.5 | Looting | |
| Extra Hits | +1 (100%) | Locations | Safe |
| Break Scale | Unbreakable | Events | Cursed Treasure |
| Tier | {{{Tier}}} | ||
| Metal Pipe | |||
|---|---|---|---|
| Weapon | Notes | ||
Megabuffs start with this weapon.
| |||
52 - WEAPON_METAL
| |||
| Stats | Trading | ||
| Power | 2 | Vendors | None |
| Cooldown | 1.3 seconds | Sell Price | Cannot be sold |
| Knockback | 2 | Looting | |
| Extra Hits | +0 | Locations | Factory, Junkyard |
| Break Scale | Unbreakable | Events | None |
| Tier | {{{Tier}}} | ||
| Nightstick | |||
|---|---|---|---|
| Weapon | Notes | ||
Survivors with Trademark Weapon may start with this weapon. Mall Cops start with this weapon.
| |||
32 - WEAPON_NIGHTSTICK
| |||
| Stats | Trading | ||
| Power | 0.8 | Vendors | None |
| Cooldown | 0.68 seconds | Sell Price | 1 food (2 food with Top Seller) |
| Knockback | 1.5 | Looting | |
| Extra Hits | +0 | Locations | Police Headquarters, Police Station |
| Break Scale | Unbreakable | Events | Helping out Someone in Need! |
| Tier | {{{Tier}}} | ||
| Ninja Katana | |||
|---|---|---|---|
| Weapon | Notes | ||
Survivors with Trademark Weapon may start with this weapon.
| |||
72 - WEAPON_NINJA
| |||
| Stats | Trading | ||
| Power | 2 | Vendors | None |
| Cooldown | 0.6 seconds | Sell Price | Cannot be sold |
| Knockback | 0.25 | Looting | |
| Extra Hits | +2 (60%) | Locations | None |
| Break Scale | Unbreakable | Events | None |
| Tier | {{{Tier}}} | ||
| Oar | |||
|---|---|---|---|
| Weapon | Notes | ||
Athletes may start with this weapon.
| |||
123 - WEAPON_PADDLE
| |||
| Stats | Trading | ||
| Power | 0.9 | Vendors | None |
| Cooldown | 0.5 seconds | Sell Price | Cannot be sold |
| Knockback | 1 | Looting | |
| Extra Hits | +1 (100%) | Locations | Camp Supplies Shop |
| Break Scale | 3% | Events | None |
| Tier | {{{Tier}}} | ||
| Scalpel | |||
|---|---|---|---|
| Weapon | Notes | ||
Surgeons start with this weapon.
| |||
114 - WEAPON_SCALPEL
| |||
| Stats | Trading | ||
| Power | 1.5 | Vendors | None |
| Cooldown | 0 seconds | Sell Price | Cannot be sold |
| Knockback | 0 | Looting | |
| Extra Hits | +0 | Locations | Hospital Raid, Medical Clinic |
| Break Scale | 2% | Events | None |
| Tier | {{{Tier}}} | ||
| Strong Katana | |||
|---|---|---|---|
| Weapon | Notes | ||
Anime Fans start with this weapon.
| |||
38 - WEAPON_TRUEKATANA
| |||
| Stats | Trading | ||
| Power | 2 | Vendors | None |
| Cooldown | 0.8 seconds | Sell Price | 15 food (22 food with Top Seller) |
| Knockback | 0.25 | Looting | |
| Extra Hits | +2 (60%) | Locations | Museum |
| Break Scale | Unbreakable | Events | None |
| Tier | {{{Tier}}} | ||
| Sturdy Cleaver | |||
|---|---|---|---|
| Weapon | Notes | ||
Survivors with Trademark Weapon may start with this weapon.
| |||
146 - WEAPON_SCLEAVER
| |||
| Stats | Trading | ||
| Power | 1 | Vendors | None |
| Cooldown | 0 | Sell Price | Cannot be sold |
| Knockback | 0.25 | Looting | |
| Extra Hits | +1 (100%) | Locations | None |
| Break Scale | Unbreakable | Events | Challenge Mode, Cursed Treasure |
| Tier | {{{Tier}}} | ||
| Sturdy Machete | |||
|---|---|---|---|
| Weapon | Notes | ||
Survivors with Trademark Weapon may start with this weapon.
| |||
54 - WEAPON_MACHETE2
| |||
| Stats | Trading | ||
| Power | 2 | Vendors | Blade Master (12 food), Fire Sale Trader (6 food) |
| Cooldown | 0.86 seconds | Sell Price | 3 food (5 food with Top Seller) |
| Knockback | 1 | Looting | |
| Extra Hits | +1 (20%) | Locations | Cabin, Camp Supplies Shop, Sporting Goods Store |
| Break Scale | Unbreakable | Events | Cursed Treasure |
| Tier | {{{Tier}}} | ||
| Tennis Racket | |||
|---|---|---|---|
| Weapon | Notes | ||
Athletes may start with this weapon. Causes fatigue at half the normal rate.
| |||
122 - WEAPON_TENNIS
| |||
| Stats | Trading | ||
| Power | 0.6 | Vendors | None |
| Cooldown | .75 seconds | Sell Price | Cannot be sold |
| Knockback | 0.75 | Looting | |
| Extra Hits | +0 | Locations | Sporting Goods Store, Athletic Store |
| Break Scale | 3% | Events | Repair Shop Repair |
| Tier | {{{Tier}}} | ||
| Wrench | |||
|---|---|---|---|
| Weapon | Notes | ||
Roller Derby Girl and Mechanics start with this weapon.
| |||
102 - WEAPON_WRENCH
| |||
| Stats | Trading | ||
| Power | 1.3 | Vendors | None |
| Cooldown | 1 second | Sell Price | Cannot be sold |
| Knockback | 1 | Looting | |
| Extra Hits | +0 | Locations | Hardware Store, Junkyard |
| Break Scale | Unbreakable | Events | Helping with Car Trouble |
| Tier | {{{Tier}}} | ||
Ranged Weapons (With Perk/Trait Bonus)[]
| Pistol | |||
|---|---|---|---|
| Weapon | Notes | ||
Gun Collectors start with this weapon.
| |||
23 - WEAPON_PISTOL
| |||
| Stats | Trading | ||
| Power | 1 | Vendors | Firearm Salesman (1 food) |
| Cooldown | 0.3 seconds | Sell Price | Cannot be sold |
| Knockback | 1.5 | Looting | |
| Penetrate | 10% | Locations | Police Headquarters, Gun Shop, Police Station, House |
| Ammunition | Bullets (max 90) | Events | Three Graves |
| Tier | {{{Tier}}} | ||
| Video Demonstration | |||

| Shotgun | |||
|---|---|---|---|
| Weapon | Notes | ||
18 - WEAPON_SHOTGUN
| |||
| Stats | Trading | ||
| Power | 0.5 per bullet (x5) | Vendors | Firearm Salesman (5 food), Shotgun Peddler (10 food) |
| Cooldown | 1 second | Sell Price | 1 food (2 food with Top Seller) |
| Knockback | 1 | Looting | |
| Penetrate | 10% | Locations | Gun Shop, House, Safe |
| Ammunition | Shells (max 40) | Events | A Strange Vending Machine, Helping out Someone in Need!, Three Graves |
| Tier | {{{Tier}}} | ||
| Video Demonstration | |||

| Cowboy Rifle | |||
|---|---|---|---|
| Weapon | Notes | ||
Gun Collectors start with this weapon. Has a 2% chance of breaking in melee combat.
| |||
16 - WEAPON_RIFLE
| |||
| Stats | Trading | ||
| Power | 3 | Vendors | Firearm Salesman (5 food), Rifle Collector (10 food) |
| Cooldown | 1 second | Sell Price | 1 food (2 food with Top Seller) |
| Knockback | 1.5 | Looting | |
| Penetrate | 20% | Locations | Gun Shop, House, Safe |
| Ammunition | Rounds (max 50) | Events | A Strange Vending Machine, Bandit Raid Defense, Helping out Someone in Need! |
| Tier | {{{Tier}}} | ||
| Video Demonstration | |||

| Hunting Rifle | |||
|---|---|---|---|
| Weapon | Notes | ||
Survivors with Trademark Weapon may start with this weapon.
| |||
17 - WEAPON_HUNTING
| |||
| Stats | Trading | ||
| Power | 4 | Vendors | Rifle Collector (15 food) |
| Cooldown | 1.3 seconds | Sell Price | 3 food (5 food with Top Seller) |
| Knockback | 2 | Looting | |
| Penetrate | 30% | Locations | Gun Shop, Concrete Bunker, House, Safe |
| Ammunition | Rounds (max 50) | Events | Three Graves |
| Tier | {{{Tier}}} | ||
| Video Demonstration | |||

| Bow | |||
|---|---|---|---|
| Weapon | Notes | ||
Silent; does not alert zombies. Survivors with Bow and Arrows start with this weapon.
| |||
199 - WEAPON_BOW
| |||
| Stats | Trading | ||
| Power | 0.5 - 2 | Vendors | Fire Sale Trader (6 food) |
| Cooldown | 0.5 seconds | Sell Price | Cannot be sold |
| Knockback | 0 | Looting | |
| Penetrate | 0 - 100% | Locations | Sporting Goods Store, Shopping Mall |
| Ammunition | Arrows (max 50) | Events | None |
| Tier | {{{Tier}}} | ||
| Video Demonstration | |||
Other Weapons (With Perk/Trait Bonus)[]
| Sports Horn | |||
|---|---|---|---|
| Weapon | Notes | ||
Pushes away and knocks down zombies. However makes lots of noise similar to guns thus increasing zombie aggression the more you use it. Ultimate Sports Fan and Survivors with the Trademark Weapon (Irritating) perk start with this weapon.
| |||
- WEAPON_AIRHORN
| |||
| Stats | Trading | ||
| Power | 0 | Vendors | None |
| Cooldown | 1 second | Sell Price | Cannot be sold |
| Knockback | 5 | Looting | |
| Extra Hits | 0 | Locations | None |
| Ammunition | 20 charges (recharges after every mission) | Events | None |
| Tier | {{{Tier}}} | ||
| E-blower | |||
|---|---|---|---|
| Weapon | Notes | ||
Pushes away and knocks down zombies. Expends fuel at a rate of 1 unit every 3 seconds while attacking. Survivors with the Trademark Weapon (Inventive) perk start with this weapon.
| |||
213 - WEAPON_EBLOWER
| |||
| Stats | Trading | ||
| Power | 0 | Vendors | None |
| Cooldown | 1 second | Sell Price | Cannot be sold |
| Knockback | 10 | Looting | |
| Extra Hits | 0 | Locations | Hardware Store |
| Ammunition | Battery (max 50) | Events | None |
| Tier | {{{Tier}}} | ||
Fight or Flight?[]
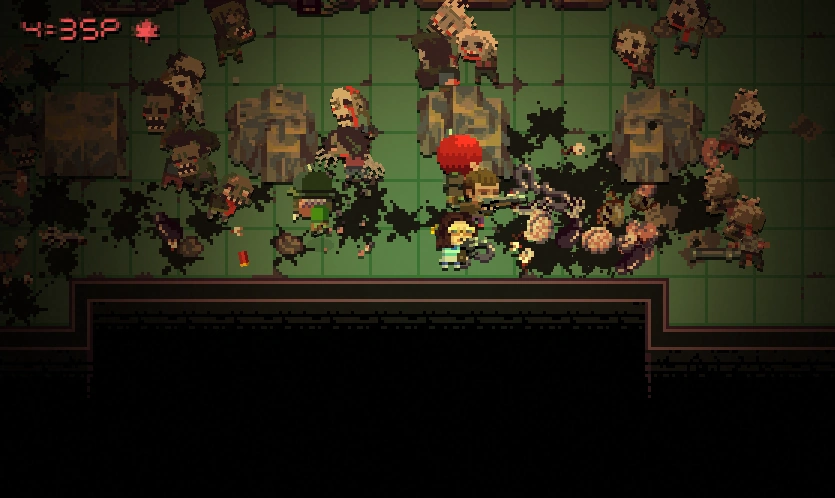
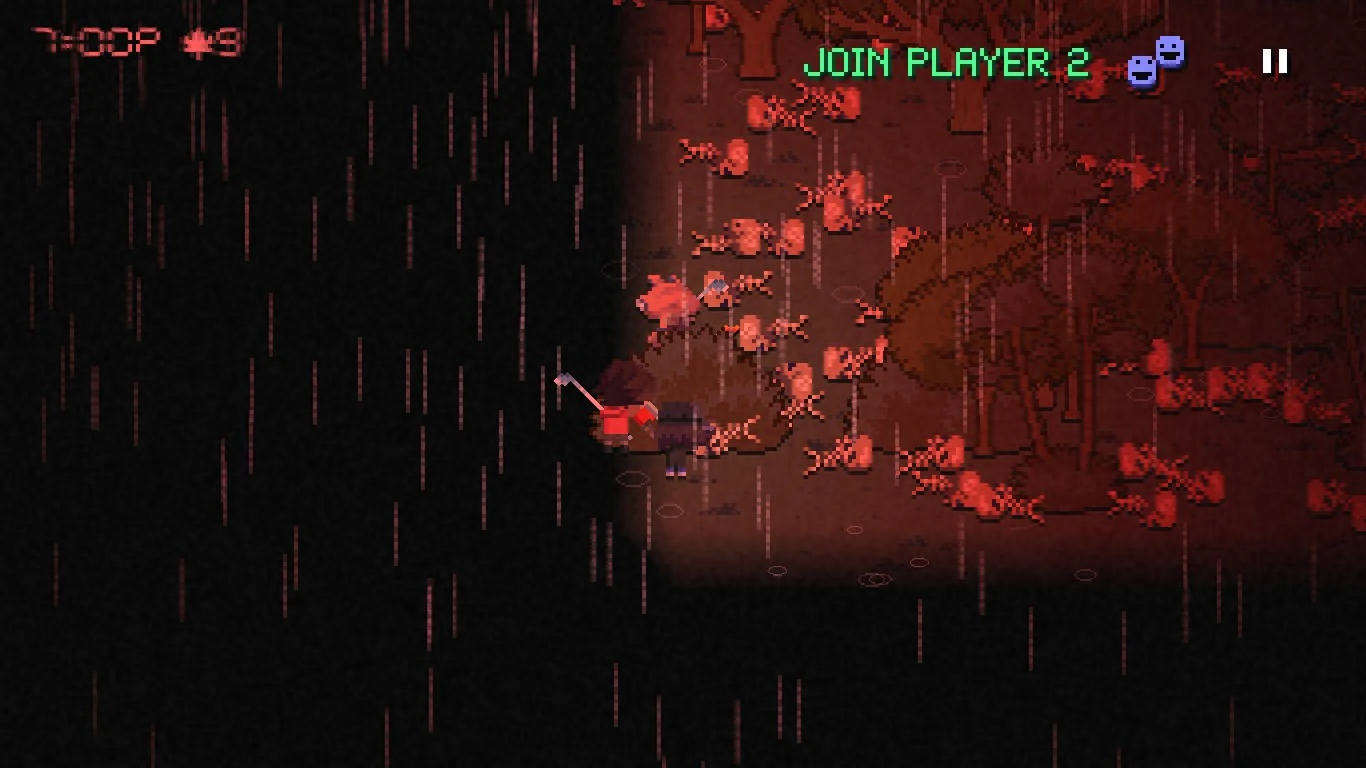
Mankind's most primitive instinct, Fight or Flight, is a valuable piece of wisdom to learn in life and in Death Road to Canada. As explain by the hint section, Zombies do not drop any loot, so it is better to run around zombies then to fight them. In easy game modes (Death Road Normal to Deadlier) you can easily run around zombies as long as the zombie forecast is low-mid on size and aggression. Harder game modes will have you more fighting then fleeing as zombies are more abundant and aggressive.
Fight[]
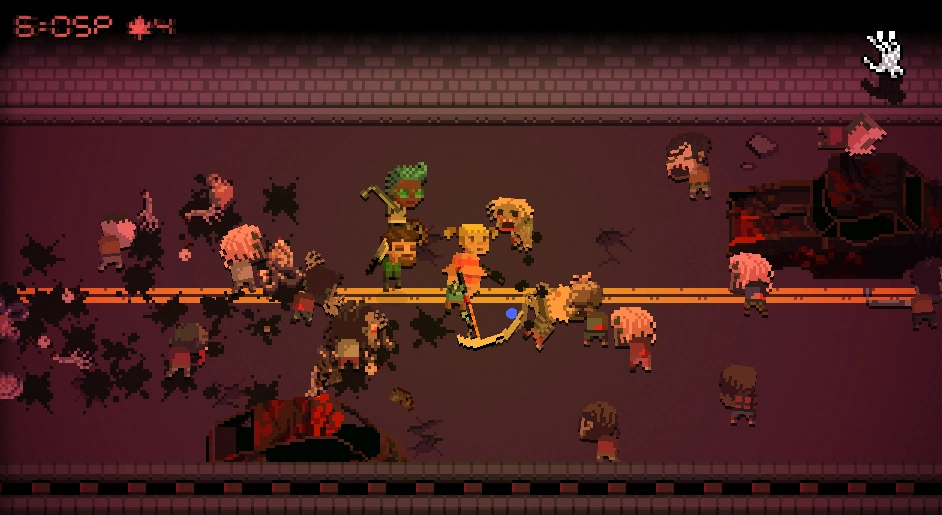
When Fighting Zombies it is better to use melee weapons most of the time (even setting the AI stance to Only Smashing) as range weapons (except for bow and arrows) make noise that can increase zombie aggression, even silence weapons can increase aggression at a slower rate. Only use range weapons during sieges or if you are cornered by a horde of zombies and your whole party is fatigued.
When it comes to melee weapons some weapons break quickly then other and some even are unbreakable. Some common good weapons for characters with low strength/fitness are Ballpeen Hammer, Claw Hammer, Hatchet, and Meat Cleaver. If you can find them, some rare weapons for weaker characters are the Aluminum Bat, Nightstick, and Xtreme Hockey Stick. Spears are really good weapons to use as most of them cause fatigue at half the normal rate and provide a greater distance between you and zombies. Spears like the tactical spear are good choices to have your AI controlled characters use as they can attack zombies further away as you go charging in like Leeroy Jenkins. As characters get strong it is recommend to get them better weapons to use as they can splat more zombies than lighter weapons. Character with high strength/fitness might like weapons like knight sword, sledgehammer, and Wooden Club. If you can find/afford them the Dragonslayer, Zweihander (Cold Steel Greatsword) and MegaKnight Blade can cut through hordes of zombies like butter (though make sure your character has full strength/fitness).
When using range weapons it is recommend to keep at least a few on character(s) in case your party get overwhelm while fatigued. Pistols/ammo are very common but are the weakest when it comes to use against zombies, they are best used by characters with low shooting. Rifles/ammo are uncommon but have high pierce and are best used with higher ranged characters. Shotguns/ammo are rare but are good against crowds of zombies and can be used by either low or high shooting characters. Bow and Arrow function similar to rifles, but it stats use strength instead of shooting to determine effectiveness. Bows are good to use in order to be silent when looting, but are slightly more ineffective than guns as it cause fatigue. Chainsaw, Flamethrower, and Weedwhacker are good weapons, but shouldn't be used often unless you have a large supply of gas; they are best used during the final sieges as you don't need a car by then.
Flight[]
"There are alternatives to fighting" Obi-Wan Kenobi Star Wars: A New Hope
Fleeing is good strategy to know in Death Road to Canada, as it reduces the chance to get eaten by zombies (unless you go running headlong into a horde). When it comes to Always be Looting, it's best to run in and grab supplies as quickly as possible, especially if it happens during the late afternoon to nightfall hours (5:00pm-9:00pm). If you are out looting during the night time (9:00pm-7:00am) zombies will increase in numbers and aggression, so it would be best to leave locations no later then 10:00pm to avoid getting overwhelmed.
Characters with high dexterity like ninja, roller derby girl, or pets are good to do solo looting events if the zombie swarm size is low.
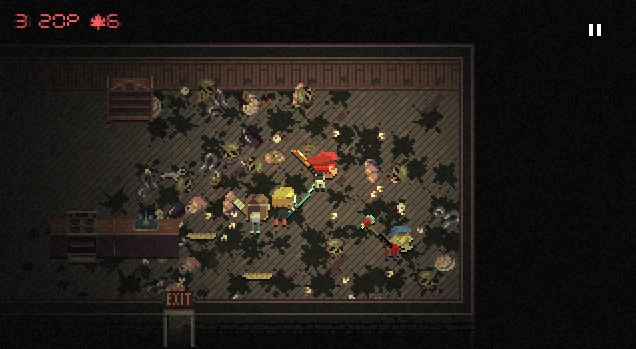
Zombies like to horde once you enter a building or a room inside of a building. Before going through a doorway you can roughly see how many zombies are outside the doorway. If not many then you can run around them, but if it looks like a large horde, it is better to hold down in the current room/building you are in and clear out all zombies coming into the area (and already within the area). Once it looks like the coast is clear, make a run for it before more zombies come. If the whole map looks like its becoming too dangerous then just make a run for the car or exit.
Also to be noted is that if your car has low chassis health it might be better to abandon the car then to risk having it explode on you and killing your party. If there are many zombies around where you car is (especially at night) then this strategy might be better then risk losing your car and getting hurt in the process.
*Glitch note* if a favorite character gets killed or your whole party is going to be killed during a siege or ABL, you can exit your game by Alt+F4, by ending the program through task manager, or if the game in is window mode you can click the exit X. You can then reload the game and the game should reload back before you started the mission. If you whole party get killed off when you do this it won't work, one person has to be alive.
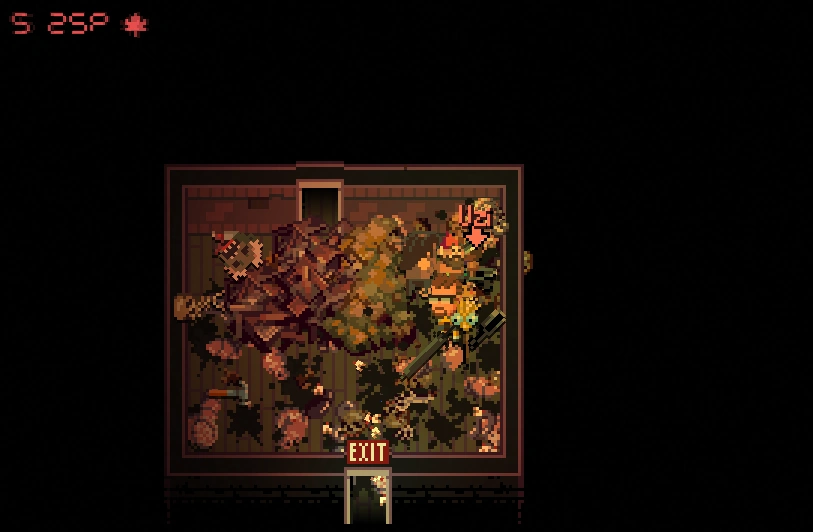
Location, Location, Location.[]
Decide on what location to do during Always Be Looting can be confusing for some players especially since some location can seem similar in description but have different layouts. When looting it should be factor on what supplies you need most critically. Before looting, make sure to see what the zombie forecast says to better equip your survivors for the situation. Below are a list of locations that are best suited or the following loot.
Jack of all Trades (average amount of everything)[]
- Apartments
- Houses
- Cabins
- Rest Stops
- City Locations
Low Food[]
- Grocery Store
- Yall-Mart
- Convenience Mart
- Restaurant
Low Gas[]
- Gas Station
- Hardware Store
- Locations with Cars
- Factories
Wounded Members[]
- Medical Clinic
- Hospital Raid
- Pharmacy
Need Better Weapons[]
- Sporting Goods Store
- Camping Supplies Shop
- Safehouses/Strongholds
- Farm
- Dark Mansions
- Police Stations
Need Guns/Ammo[]
- Gun Shop
- Safehouses/Stronghold
- Police Stations
Need a new car[]
- Any locations that say 'with car' (this is important to note if your car has low engine health and you have no high mechanical in your party).
Need more people[]
- Bar
- Rescue missions
- Pet Shop (if character has friend of dog perk)
Need better training[]
- Bookstore
- Gyms
- Arcades
Having characters with the Explorer Perk can help with ABL rerolling if you get bad location selections. If you don't have an explorer you, but have either a lot of gas or cars that have low gas consumption you could get better location rerolls. If you are good on supplies and have good weapons (a maybe a bit of luck) you could do a Rare Location for greater loot. Some less risky Rare locations would be Fishing Cabins, Hunting Lodge, and Malicious House.
*Glitch note* if you are dissatisfied with the location you chose, you can exit your game by Alt+F4, by ending the program through task manager, or if the game in is window mode you can click the exit X. You can then reload the game and the game should reload back to the ABL choice page.
Dealing with your AI partners:[]
Your AI partners tend towards the dumb side. Getting caught in zombie hordes, wasting ammo and swinging their weapons even when they're tired. To keep your AI partner safe notice when they are sweating and surrounded by zombies. Change their AI to running to get them out of there! Sometimes your AI partner stands around whilst you do all the work. When they see zombies but are just standing around admiring the scenery, change their AI to aggressive. Then they will get in there and start smacking. What if your AI partner is wasting ammo or attracting to many zombies with gunshots? Change their AI setting from "shooting" to "melee". They will soon start smacking instead of shooting.
Fatigue:[]
Firstly, what is fatigue? Simply put, when your character starts sweating from over-exertion, as you've been swinging the weapon too much, that is fatigue. When a character is fatigued they move much more slowly, and deal much less damage. The AI doesn't understand fatigue, and will happily keep swinging whilst surrounded by a zombie horde, dealing next to no damage, and being consumed by the zombies due to being too slow to get away. This is why you change their AI to "running" when you see them sweating nearby a horde.
Weapon choice for AI partners:[]
AI partners won't try to catch multiple zombies in one swing of a weapon and will just swing a weapon again and again, getting tired. What does this mean? It means that there's very little point giving them weapons that hit multiple zombies each swing because they will just swing the weapon, and only hit one zombie at a time. Also, heavy weapons cause MUCH more fatigue. So, the AI partner will almost immediately start sweating and dealing next to no damage to the zombie horde. This means heavy weapons suck for the AI. To stop your AI partner sucking, instead give the AI weapons like the Tactical Spear. Weapons that cause little fatigue, hit one target at a time, and can be swung again and again to turn that zombie horde into mulch.
A note on weapon choices, since the Nerve Update, AI partners will now prioritize certain weapons over others. They will always pickup a gun whenever given a chance. Sometimes they will drop good weapons to pickup a crappy weapon instead. To prevent this, have you AI partners weapons slot lock to the main weapon they will be using. They will also always throw consumables like eggs and pukeyballs. So it it best sometimes to not give them these weapons as they will waste them. It may take some micromanaging to keep your teammates from making bad weapon decisions, but it can help keep you alive long enough to reach Canada.
Who can be trusted?[]
When driving on the Death Road you will meet at bunch of interesting people. Some might seem good but turn out to be a complete jerk. To new players it can be hard to find good people to accept into your party and what traits can be a benefit or a drawback to your group.
When looking for new survivors it should be considered to create a good amount of familiar characters (custom characters) to help you on your journey. The 2 benefits of making custom characters is one, they are characters you made and know what perks, traits, and skills they have and two, they don't cost food to recruit at trader camps.
Having a Paranoid Character can help show if new recruits are lying about their skills or not (this doesn't work for rare characters). If you are low on manpower and don't have a paranoid character then you should probably recruit most characters you come across (there are some you still shouldn't). There are some events that can reveal stats for one or more skills on one personal or the whole party.
Single Person Events[]
Party Events[]
- Can Shooting Practice (Loyalty)
- Dark and Creepy Store (Composure)
- Health Food Havoc (Attitude)
- Mysterious Radio Signal (Wits)
- Death Road Sing-a-Long (Wits and Attitude)
- Old Campground (All Personality Stats)
When it comes to character stats, be aware that loyalty and attitude share an equal importance when getting new members. Low loyalty members are very bad during events like the Quietly Disappearing despair event and Who can be trusted?. Low attitude characters will lose morale faster than most and trigger bad despair events if they get lower than ![]() .
.
What a bunch of Weirdos[]
When it comes to rare characters many of them can be good to recruit however, some of them are pretty crappy and a few shouldn't be recruited at all.
Good Rare Characters[]
- Alvis
- Barbarian
- Bryu
- Caveman
- Contender
- El Satan
- Gordo
- Pirate Captain
- Rambeux
- Saguts
- Samedi
- Valkyrie
- Any of the Stamp Users (CharBro, E*FUDD, H. Heck, Ziggy)
Recruit only when low on party members.[]
Do Not Recruit under any circumstance[]
- Governor Emperor - is a Big JERK
- Mason/??? (unless you want a cheevo) - Cannot get rid of him, will kill of entire party (not good for rare character achievement runs)
- Horse (unless you want a cheevo) - it is better to get a morale boost of letting him run free
- G*rf (unless you want a cheevo) - very difficult to keep morale up (max morale is
 ) and will trigger a nasty siege if it falls to zero
 - The Last Bodybuilder (T*L*B) (unless you want a cheevo) - it is better to get a strength increase
- WYK-TV Skeletons (unless you want a cheevo) - they Reek of Failure
Event Planner[]
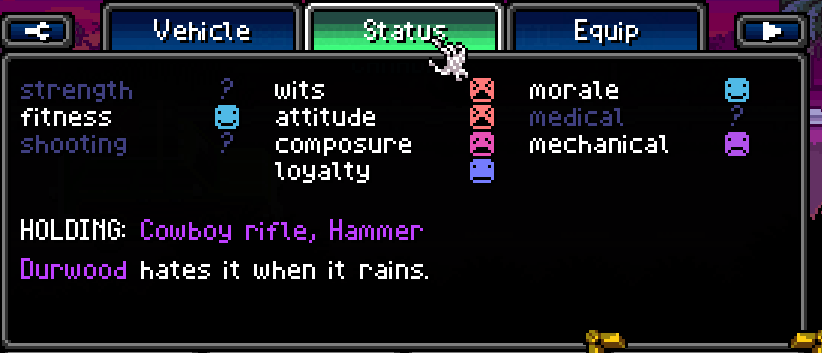
The Death Road is full of surprises at every turn, it should be well noted that each event has different outcomes (being from mostly good/bad to partially good/bad). For a full inquiry on events please visit the Events page for more information, you can also look at the traits page for how different personalities work and what events are better/worst for those characters.
When it comes to events it is important to know how high of skills (being either personality, combat, or support) a character has. The outcome of events are based on a simple algorithm: where values from 0 ![]() to 2
to 2 ![]() will most likely end with failure/negative outcome while values from 4
will most likely end with failure/negative outcome while values from 4 ![]() to 6
to 6 ![]() will most likely end in success. Before making a choice look at that status section in the menu (you can do this by clicking on the ? icon in the top right corner or hitting the escape key (or menu button on console).
will most likely end in success. Before making a choice look at that status section in the menu (you can do this by clicking on the ? icon in the top right corner or hitting the escape key (or menu button on console).
Some tests use more than one skills to determine the outcome of the test like Fire! and Who can be Trusted? Some tests can have more than one way to get a positive outcome (as long as one of the skills is high), for instances Twinkie Truckin, Ma Hooth, and Fight or Flip.

Example of what the Status looks like.
Below is a general list of what tests do better with the coordinating high skills (single skill only tests).
Test of Strength[]
Test of Fitness[]
Test of Shooting[]
Test of Wits[]
Test of Attitude[]
Test of Composure[]
Test of Loyalty[]
Test of Medical[]
Test of Mechanical[]
Having a good variety of characters can help out a lot, especially if they have good stat-combos. Just remember characters typically work better if the party has similar stats, for example characters with low loyalty work better when you want to steal stuff from traders and events; while characters with high loyalty will lose moral if you do. Characters with high attitude will take less hits on morale during certain events and can gain morale back quicker. It is always important to look a character stats before making a decision on an event.
*Glitch note* if you are dissatisfied with an outcome on an event you chose, you can exit your game by Alt+F4, by ending the program through task manager, or if the game in is window mode you can click the exit X. You can then reload the game and the game should reload back to the event choice page.
Bargaining with Traders[]
First thing to note, ALWAYS STOP AT TRADER CAMPS!!! Why? Because trader camps (depending on the one you get) can sometimes have FREE loot lying around that you can get. Sometime the loot is just ammo or an unopen toilet, however, sometimes you can get lucky and get a good amount of food, medical, or even gas at trader camps. Sometimes you can even get weapons like guns or explosives at camps; all for free. Also if you have low to no food, some traders will take pity on you and give you free stuff as well.
When it comes to shopping from traders, it can be a tricky business to find the right deals for your character(s). When purchasing new item, make sure that you have at least enough food for a full meal (7-9 depending on character traits). And if you are for sure going to lose your car after the trader camp, then don't trade any food for you might not have enough during or after walking events. Also to be noted is that if you want to steal from traders, be aware that party members with 2 ![]() or higher loyalty will lose moral each time you steal and beware because most traders will fight back possibly killing your thief character and perhaps the whole party off. Below is a list of what traders sell and what should and shouldn't be purchased from them.
or higher loyalty will lose moral each time you steal and beware because most traders will fight back possibly killing your thief character and perhaps the whole party off. Below is a list of what traders sell and what should and shouldn't be purchased from them.
Traders marked with # can be told to COOL IT!.
Trader marked with $ gives away free stuff if you have low-no food.
Trader marked with @ can be stole from.
Weapon Traders[]
- Anime Salesman#$@ - The only good thing to buy is the Anime Figure [10 food] because it gives 3 moral to the whole party.
- Army Surplus Fortress - Not really good, prices are more expensive than other dealers, best used at the Last trader Camp Before Canada and you have a lot of food.
- Axe Merchant#$@ - Fire axe [6 food] and electric guitar [10 food] are good with characters who have high strength/fitness.
- Blade Master#$@ - If you can afford them Knight Sword [20 food] and Claymore [35 food] are good with characters who have high strength/fitness.
- Blunt Master#$@ - Really only the Mega Maul [16 food], everything else is pretty common to find.
- Firearm Salesman - Revolver is good for his normal sale, but if you can get him to show you the good stuff, the Flamethrower [35 Food], Auto-Shotgun [25 Food], Assault Rifle [20 Food], and Uzi [12 Food] are the cheapest price from him.
- Handy Tools Salesman - Flashlight [1 food] if you lost your original 2 and the full health spray [6 food] if you don't have medical supplies.
- Heavy Ordnance Trader$ - All of his weapons are good, but should only buy if have a lot of food and no explosives for sieges.
- Pipebomb Supplier#$ - Overall, not really good unless you really want a pipebomb (Also Don't Steal From Him). Funny thing though, if you hit his pipe bomb crates they will sizzle and explode similar to propane tanks. If the pipebomb seller and any other sellers are close enough you can kill them, just make sure your group is a safe distance away.
- Polearm Pal#$@ - The Tactical Spear [9 food] is a great weapon, and does good damage while only causing fatigue at half rate. Good to get for whole party if food permits.
- Rifle Collector#$ - Best price to get a Minigun [65 Food], but the Assault rifle [25 food] is good as well.
- Shotgun Peddler#$ - All the shotguns, except for the normal one, are good as long as you have between 25-35 food to spend.
- Silent But Deadly$ - Silence pistols [3 food] are a good deal, but silence rifle and shotgun are good but more expensive.
- Weapon Fanatic#$ - Not really all that good of deals, also does serious damage when told to Cool It! (unless fully charged).
Supply Traders[]
- Ammo Emporium Dog@ - Best trader to buy ammo from. If you have a Friend of Dog perk character, you can get a good amount of free ammo.
- Bullet Surplus@ - Only if low on bullets (and have weapons to go along with them).
- Gas For Sale@ - Really good trader to find, gas can just be as important as food. Get if you are low on gas.
- Gas to Snacks Conversion@ - Not really all that great, gas is better to have for car and for using weapons during sieges.
- Medical Attention@ - Only do if whole party is wounded and have no medical or really bad medical stats.
- Medicine Salesman@ - Good to get if you are low on medical supplies.
- Rifle Ammo Seller@ - Only if low on bullets (and have weapons to go along with them).
- Shotgun Shell Stand@ - Only if low on shells (and have weapons to go along with them).
- Weapons Barterer@ - Good to give surplus weapons to. If you have a Top Seller perk character in party you can get extra food.
Training Traders[]
- EZ Medical College# - Better for group training than individual. 50% chance to be charmed by Charming Characters.
- Firearms Coach# - Better for group training than individual. 50% chance to be charmed by Charming Characters.
- Fitness Instructor# - Better for group training than individual. 50% chance to be charmed by Charming Characters.
- Mechanic Savant# - Better for group training than individual. 50% chance to be charmed by Charming Characters.
- Strength Trainer# - Better for group training than individual. 50% chance to be charmed by Charming Characters.
-Note, once a trainer has been charmed they will not sell at all, regardless of success or failure.
Special Traders[]
- Free Range Chicken - Cheap way to get Spawning Items.
- H*NK - the Ded9 [10 food] is good, but is better to recruit him for 20 food instead.
- Head Swap Doctor - 5 food for a stat(s) change, sounds gud .
- Kip's Science Machine - 5 food is a good first deal, if you have a lot of food (60 or more), why not get the whole party zapped. Nothing could go wrong .
- Lynn C. Thompson - the sword is expensive, but really good for a high strength/fitness character. If not at full party size, recruit him to get the sword reduce from 45 to 30 food.
- Rare Book Trader - the 5 food for a stat book is good. If you have 15-30 food you can get a character the Friend of Dog and/or the Explorer perk(s).
- Romero- Very good to find, can either get all combat stats buff +1 or some good weapons, all for free.
- Sir Boney# - The Skull Hammer [25 food] is good for a high strength/fitness. The Bomb Skulls [5 food for 5] are good as well. This is a good character to recruit if you have a fully charged Cool It! There is also a free skull bomb hidden among the piles of skeletons around his stand.
- Sleepy Trainer - for a total of 7 food you can learn two random skills and get the Sound Sleeper Perk. However, once you get the perk you will be forced to leave the camp, so only do if you are planning on leaving the camp.
- Tnomey - Uses ZP points instead of food. One use per game. Good to have in a tight pinch. Get what you think you need most. "OOooOooOOoOOoOOoOOOo!"
- Turret Nerd$ - Turrets [6 or 12 food] are good to have in sieges, will give you a free pukeyball if you have no food.
- Witch# - Not really all that good. Will turn a character into a skeleton if told to Cool It! (even if fully charged). Only get if you what cheevos for her or her cat.
- Wizard - Best to buy the Wizard for 20 food because his staff is really good at crowd controlling.
Hidden Laboratory[]
- Mad Scientist - The stuff she sells is good, however, if you have 20 food its just better to buy her as she has all her stuff with her
- Helpful Robot & Menacing Robot - Both are good to have in sieges [3-6 food].
Ye Olden Renaissance Faire[]
- Light Weapons Knight$ - The Gladius is the best thing to get at this merchant, it is a upgraded version of the Sturdy Machete.
- Medium Weapons Knight - All the Weapons are good at this merchant as long as you have a high strength/fitness character.
- Heavy Weapons Knight - Only get if you have a lot of food and a Character with over maxed strength/fitness. Megaknight Blade [35 food] give whole group strength training as well.
- Armor Merchant - Expensive [40 food], but if you have a lot of food, not a bad deal for +3 vitality.
Swole Mountain[]
- THE GYM U GET SWOLE - Cheaper than other trainers and can be trained multiple times (though it increases the cost by 2).
- THE GYM U ALSO GET FIT - Cheaper than other trainers and can be trained multiple times (though it increases the cost by 2).
- Special Boxing Trainer - If you have 20 to spare, not a bad idea to get boxing, strength, and fitness. (if a character already has boxing then they get +1 dexterity.
- Shady Trainer - The Perfect Diet [20 food] is really the only thing you should get here, (though brass knuckles [3 food] isn't bad). The Forbidden Pump should only be used if you have T*L*B in your party so that he can grab and slam zombies.
Trader Inferno[]
- Fire Sale Trader - Very good to find, his stuff is cheap and mostly good. Just be careful of the fires in the area, they will kill your characters instantly.
The Last Arcade[]
- Road Punchers - For 10 (or 20 food for both) you can recruit Bryu and Saguts, which are good characters to get.
- Unknown Machine - For increments of 2 food (starting at 2) you can get shooting and morale increases.
- Fire Exploders - For 10 food you can get the Fireproof trait (at the cost of 1 vitality), if a character already has fireproof or the phoenix trait they get 2 morale instead.
- SHINY*AXE- For 10 food you can play on normal or hard difficulty. Depending on the difficulty you will have to pass a fitness tests. Passing or failing the test will still reward you with a Golden Axe [Normal Difficulty] or the Heavy Golden Axe [Hard difficulty], however, failing will decrease character moral and vitality by 1.
Prepper Paradise[]
- Pinnacle Weapons$- Good weapons and has the cheapest price for Minigun [35 Food] as well a the Big Dawg [20 Food] and the exclusive Golden Pistol [15 food].
- Carnage Weapons XL- Way better than the Heavy Ordnance Trader, selling XL weapons for cheaper prices. Bazooka XL [15 Food], Grenade Launcher XL [12 Food] and Napalm Launcher XL [12 Food].
- Survival Gear$- Ok weapons, the Survival Knife [6 Food] is the best to get from here, and maybe healing spray XL [10 food] if you are low on health. The Bow {with 50 arrows} [5 Food] is pretty common to find and is only good with high strength\fitness characters.
Mechanical Fortress[]
- Every Car Must Go! - Really good deal; you can get a brand new car for only 5 food! He will sell even rare cars like the Clown Car and U.F.O
- Expert Garage - 5 food for total repair job is good, but if you can spare 35 food you can get full car modifications (just hope your party mechanic is good at what they are doing when it breaks down).
- Electric-Powered Tools$- Electric tools are typically better than gas powers, even though they are weaker, you don't have to worry about consuming gas which should be used in the car.
- Gas-Powered Tools$- Gas powered tools, though stronger than electric, can be very costly in gas power, and can cause you to run out of gas quicker in your car. Would only get if you have gas to spare.
- The Tool School - Cheaper than other trainers and can be trained multiple times (though it increases the cost by 2).
Final Hospital[]
- Burn Unit - only do this jerk if a character has higher than 5 as this trader will cause significant morale lose which could cause despairing.
- Cleaning Lady - for 10 food she can increase a characters vitality by 1, fully heal, and raise morale by 4. Also a decent character to recruit.
- Medical Supplies$- Will sell medical themed weapons. The Bonesaw [6 Food] is good, but is sort of common to find, and healing spray XL [10 food] should be if your party has bad medical stats. However, the Golden Scalpel [15 food] is a really good weapon to get if you have enough food.
- Probably a Troubled Genius Doctor$- a cheap way to get healing across to whole party for only 5 food.
- Saint Hospital Bathroom University - Cheaper than other trainers and can be trained multiple times (though it increases the cost by 2).
-To be noted, the glitch trick doesn't work for traders. If you exit out of the game during the trader camp you can't reload back into the game right before the trader camp event text. The game will reload back to before you entered the trader camp, however, all previous purchases, recruits, and loot will be lost.
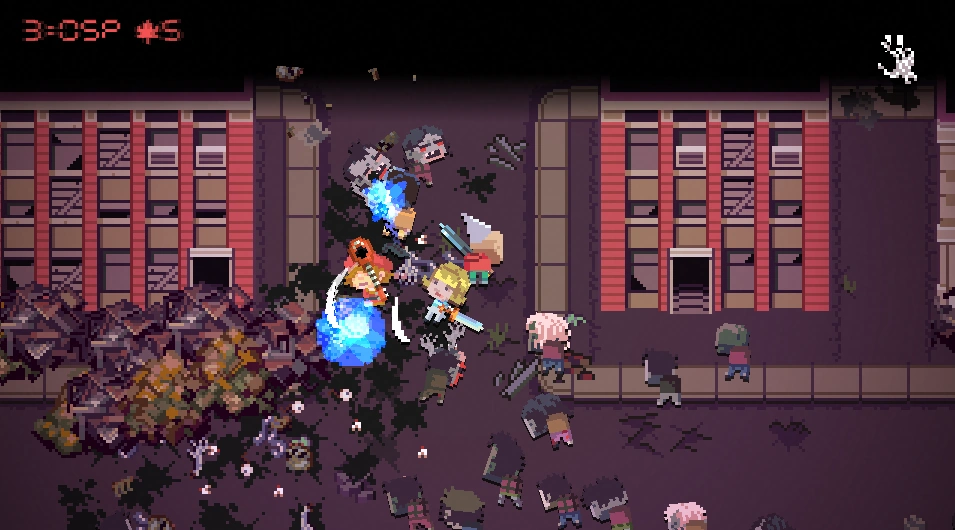
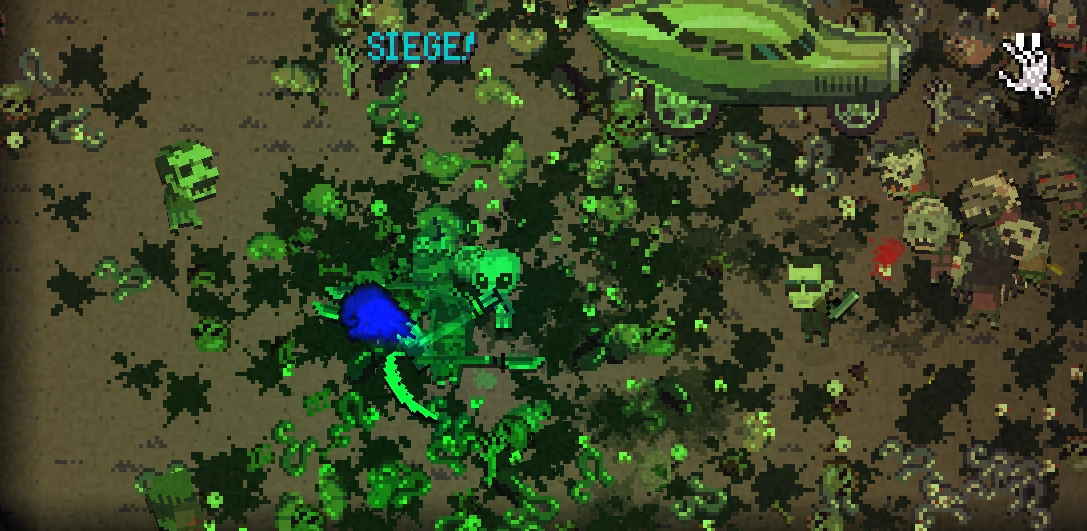
Siege the day![]
Sieges and Runs are unavoidable events that come up on the Death Road which can easily kill off characters or your entire party. Being prepared for sieges can mean the difference between life and death. It is always a good habit to stock up on guns and ammo for sieges, as characters can easily get fatigued due to the high amounts of zombies in the area. Having Spawnable items such a chicken eggs, Robots, or Pukeyballs can get you out of a tight pinch if you are overwhelm with zombies. Explosives are good at clearing out hordes of zombies, but can be dangerous in close spaces (Molotov's work best in areas with trees for continue burning). Chainsaws and Flamethrowers are good last resort weapons if all else fails, but both can use gas so make sure you have enough for you car as well. Below is a list of different sieges and runs and what you should do. *Glitch notes* cannot be used to avoid sieges.
Sieges[]
House Siege[]
- Find a suitable defensive position and hold out until time is up. A large Bathroom or Kitchen can be helpful, however, if the layout can allow you to run around (i.e a middle wall in the center) you should do that instead. Try to not get cornered and if you do use guns, explosives, or motorized weapons to get out. Once the siege is over get out as fast as you can.
Cabin Siege\Cabin Rescue[]
- Find a suitable defensive position and hold out until time is up. Depending on the layout, you can try to place yourself between the zombies using heavy furniture. If their is a sink/counter layout move between that and the zombies. Try to not get cornered and if you do use guns, explosives, or motorized weapons to get out. Do not try to go outside until the siege is over, once it is over all zombies outside will be killed off, just try to clear out any inside and make your escape.
Suburban Siege[]
- This is a nasty siege, guns and explosives are recommended. If the layout has any, try to run around the buildings, if not then try to out maneuver the zombie horde. Do not go inside any of the houses until X:55, then get inside a house if you are able. If you do get inside, once the siege is over all (or almost all) zombies will be eliminated automatically and you can escape (or quickly loot if you want). If you are unable to get inside of a house in time then make a run for the exit.
Backs to the Wall[]
- This is also really bad siege, guns and explosives are recommended. This map layout doesn't allow for running around in a circle and makes it differcult to out maneuver the zombie horde. Your best bet is to use guns, explosives, or anything to avoid being eaten, if you have space to move try to hug close to the edge. Once the siege time hits X:55 you can try to go inside a house and have all outside zombies die, but this is harder to do then in the Suburban Siege. When the siege is over try to get out as quick as possible (its best to hug the corners of the map to make for a quick getaway).
Stuck in a Ditch[]
- This is the only siege that lasts for 0.7 of an hour, however can be dangerous depending of the map setup. A few rusty cars can make for either barriers or obstacles for your party, if possible try place yourself between the cars and the zombies. The best way to survive is running around the corner of the map to make for a fast getaway.
Mall of the Dead[]
- This can be a very deadly siege due to layout and length of time of 1.5 hours. There are two mall cops that can help you in this siege if you interact with them (or they can be used for zombie chow if you get overwhelmed).
Last Sale at Yallmart[]
- This siege can be tricky to begin with, but can be pretty easy once you get inside. Outside there can be a lot of zombies, especially in harder game modes. Try to push inside and then stay at the topmost part of the building, move from left to right occasionally to avoid being eaten. Some loot is inside, it is best to get them at first before you get overwhelmed. Zombies don't die outside once the siege is over. The aisles allow for good barriers against zombies, but can also become your tomb, if you get swarmed on both sides. Once the siege is over, make a run for the exit.
Caught in the Open[]
- Similar to the stuck in a ditch, but deadlier and 1 hour long. More zombies spawn in this siege and can easily overwhelm even a strong party. Depending of the map setup, you can sometimes get cornered very easily. A few rusty cars can make for either barriers or obstacles for your party, if possible try place yourself between the cars and the zombies. The best way to survive is running around the corners of the map to make for a fast getaway.
Gas Station Siege\Gas Station Rescue[]
- Depending of the zombie forecast, it is typically better to head inside first instead of getting gas (there is a risk of the zombies destroying the gas pump if you stay outside for too long). Once inside (and also outside) beware of the propane tanks, if they are hit they will go off and possibly hurt your team. It is best throw them at a horde of zombies and head inside one of the smaller rooms once they go off. Guns are recommend at this siege, but if you have good melee characters you can do this without them, use the aisles as a barrier between you and zombies, killing those that get too close to you. Once over all outside (or almost all) zombies will be killed which then you can loot the gas and any food you find.

Roadside Rescue[]
- The layout is basically a rest stop, just with more zombies. It's best to stay in main room as it is large and easy to maneuver around, but don't forget to find the survivor first as they can be eaten if you don't act quickly. Once found, try to avoid opening up unopen rooms to avoid having to fight more zombies. Once over head for the exit, as not all zombies will despawn once this siege is over.
Runs[]
Try to keep moving, unlike sieges, Runs don't end on a timer, you need to find the escape exit in order to get out. Runs can sometimes be deadlier than sieges as there are no really good defensive positions to hold out and have an increase zombie spawn size. If zombies forecast show aggression as sluggish or calm, try not to use guns or explosives unless the zombies begin to become aggressive.
Factory Complex[]
- Try to keep moving, keeping close to the edges of the map. Some rooms may have loot in them, but should mostly be avoided to prevent being cornered by zombies. If a Rescue, the survivor in distress will spawn at the entrance, but depending on the zombie forecast they can get killed quickly if you don't intervene right away.
River of Death\River of Sludge\Sewer Rescue[]
- Keep moving and don't stop as additional zombies can spawn in this run. Some side-rooms may have loot in them, but should mostly be avoided to prevent being cornered by zombies. If a Rescue, the survivor in distress will spawn at the entrance, but depending on the zombie forecast they can get killed quickly if you don't intervene right away.
Car Preservation Tunnel\Tunnel Gaunlet[]
- Running around the zombies is typically better than fighting them off. Some rusty cars may have loot in them, but avoid them if you start to become swarmed. Try to make it without using guns, but if overwhelm then fire all the way.
Last Street in the World\Dirt Road Out of Here\Rough Road to Safety\Long Country Walk[]
- Similar to the Car Tunnel, but more dangerous as additional zombies can spawn from the sides of the map. Loot cars only if you are in a safe position. Try to make it without using guns, but if overwhelm then fire all the way.
Rare Sieges[]
Hermit's Cabin[]
- Practically like the regular cabin siege, just with a Grizzly Hermit 'helping' you out. Typically a more dangerous siege, because of the swarm size. You can recruit the Hermit if you have a fully charged Cool It! or a Charming Character. Otherwise its best to ask him for wisdom to gain +1 shooting and vitality.
UFO Landing Site[]
- The event is good if you need a new car and/or have low gas. However this 2 hour long siege is dangerous without good weapons. Your best bet is to talk to the alien at first so it follows you around. The Man in Black won't follow you, but can be a distraction for the zombies. Keep running around to avoid the zombie horde using the alien as support, but don't let it die. Once over don't talk to the alien until you are finished mopping up the rest of the zombies and then talk to the alien (to avoid having the car taking damage and the alien leaving you).
The Monday[]
- This siege only happens if you recruit G*rf and his morale drops below 1 . The siege last for 2 hours and it is very hard to survive without good weapons. The area is a open map with some trees and skeletons. The best way to survive is to out maneuver the zombie horde, while keeping their numbers in check. You can easily be overwhelm by the shear numbers of zombies that spawn. The best way to avoid this siege is to not recruit G*rf.
Night of the Clown[]
- This siege only happens if you recruit the Clown and his his morale drops below 1 . The siege last for 2 hours and it also very hard to survive without good weapons. The area is just like that of a regular house siege, just with scary clown zombies😱. The best way to survive is to out maneuver the zombie horde, while keeping their numbers in check. You can easily be overwhelm by the shear numbers of zombies that spawn. The best way to avoid this siege is to not let the clown's morale get too low, or don't recruit the clown.
Fatal Argument (Party)/Haze of Despair (Solo)[]
- This event happens when a character has a despair event. The 2 hour long siege(s) takes place in a house and is very deadly. The only way to survive is to have good melee weapons, a lot of guns and ammo, explosives, motorized, and/or consumables. These sieges are meant for you to die, but are not unbeatable. If you survive your character(s) will gain 4 morale. Unfortunately, the exit *Glitch* doesn't work when you get this event, if you exit out it will reload back to this event text; so either prepare for this siege or give up and try again.
End of the Road[]
Once you get to the last day of driving you will have to prepare yourself for the final sieges, which can easily kill your party off if unprepared. To be noted, there is no Always Be Looting on the last day, so stock up on weapons, ammo, medical, and food in the final days in preparation for the last day. On the camping event before the last day (end of day 2 before Canada) you should always try to get rest to avoid the negative penalties of tried. It is also good to have a good stockpile of food to do some last minute buying at the Last Trade Camp Before Canada; having some extra weapons (like guns or better tier melee weapons) can be sold for extra food.
What to do at the Last Trade Camp Before Canada[]
The Last Trade Camp Before Canada, will always have a Gas to Snack Conversion and a Weapon's Barter at the entrance (be aware that if your car goes out before the trader camp event, you won't be able to sell weapons in the car's trunk). Inside the wall there is typically 2 different traders and two characters you can recruit (one will always be a good standard recruit and the other will vary based on game mode). Inside the building there can be 2-3 different traders inside. It would be advise, if you have the food to spare, to stock up on extra ammo and medical if you are very low on them. Also maybe buying a better weapon for certain characters (based on their stats) would be a good idea. Also it wouldn't hurt to get a good recruit if they have better stats than one of your current party members (mechanics aren't really needed at this point). If you car is in good shape, but low on gas maybe get some extra gas to allow you car to do the ramming speed cheevo at the Canadian Border or if you want to use chainsaws or flame throwers. Finally if you have a fully charged Cool It, this would be the last time you can use it, just be aware if you don't have a fully charged one, don't use it until you are finished with the camp.
Cabin/House Border Siege[]
After you leave the trader camp, there is no turning back. The first siege you encounter is a hard 1.5 hour siege that can take place in either a house or cabin setting. If you get the cabin go inside and hold off the zombies from within, if there is a sink/counter placement inside try to place your group between it and the zombies. If you get the house then try to find a good place to hold out until the end, a kitchen or bathroom can help if one is available. *Remember the glitch notes if you get a bad location or your party is about to be zombie chow.*
It is good to use guns, heavy tools (gas or electric), explosives, or consumables if you are becoming overwhelmed. Remember also, zombies are weaker when they are knocked down, don't give them the change to get back up. Once the siege is over, try to find the fastest way out, don't try to kill all the zombies unless they are blocking your escape.
City of Crushed Hopes[]
The Final Siege is a grueling 4 hour siege that is meant to push your skills to the limit. Their are many strategies to win this dangerous siege, but for simplicity we will discuss only two: Silent but Deadly and Gun's a Blazing.
Silent but Deadly[]
-This tactic was inspired by Youallarefatbtw (it's not fat it called Big Boned.)
- For this strategy, right when the level load have your party members change tactics to smashing only and then run inside the nearest open house. Stay inside away from the door and only smash zombie that come inside. Zombies will fall from the ceiling, but be knocked down for easy killing. Some zombies will come inside from outdoors, but most of the time be a few as long as you don't use weapons that make noise. Hold out for 4 hours and you should be good, just be aware sometimes you can get overrun due to level layout, *Remember the Glitch notes*, this tactic works about 8/10 times, but can really only be done if your characters have high fitness/strength and good melee weapons.
Gun's a Blazing[]
- For those who want to have a epic fight you can just shoot up the place if you have lots of guns and ammo to use. This tactic also works if you have explosives and consumables to help you. It is advise to keep moving around to avoid being cornered by zombies. If the map layout doesn't allow for running in circles just remember *cough* *cough*, *Glitch notes*. This tactic is good if your character have mediocre strength/fitness stats, but have enough guns and ammo; high skills is shooting also helps. Having explosives help if the horde size becomes too massive. Once the siege is over, get out as fast as you can, don't try to loot if there are too many zombies.

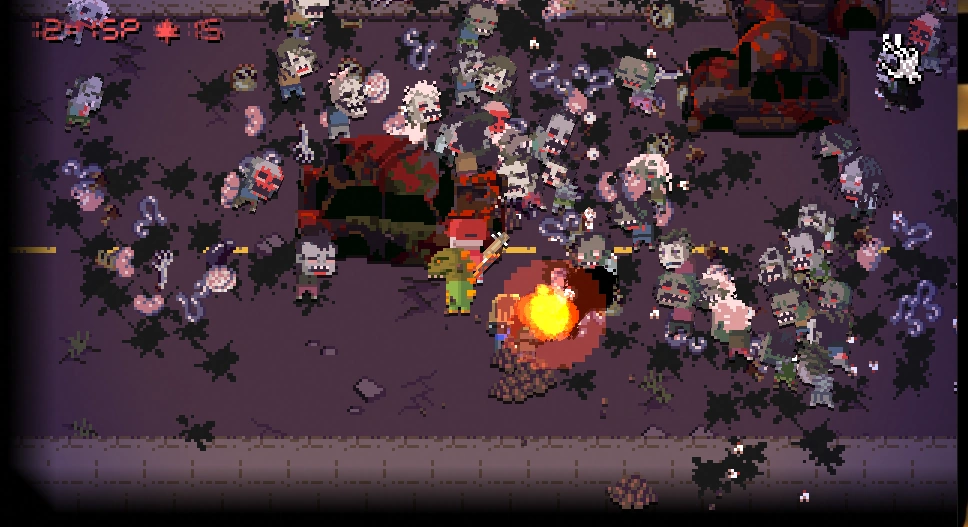
The Horde has a weak point right around here.
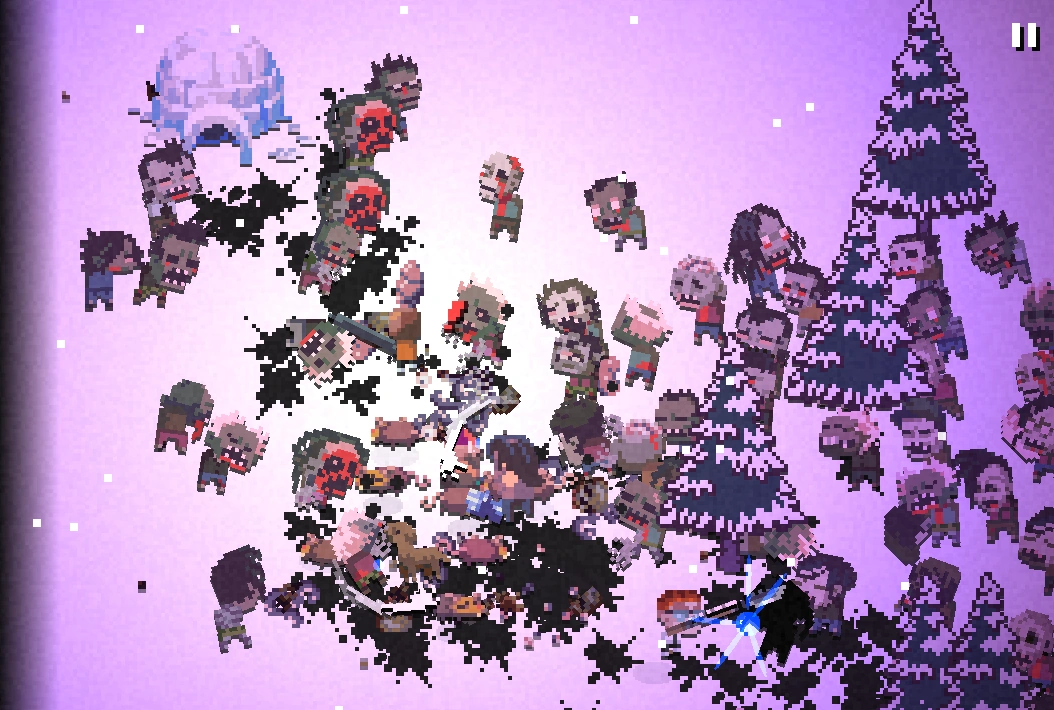
The Canadian Border[]
- You're almost there, however, the Canadian Border is swarming with Zombies so you will have to fight your way to the Border Checkpoint. If you have a car still at this point it will ram into the first zombie horde doing a fair amount of damage, but if you don't then it would be advise to use guns or explosives to get past the horde. On the bridge try to outmaneuver the zombies if you can, but fight if you have to. Once you clear that run over to the far left side of the map and head up. Once you see the Igloo try to find the weakness point in the horde size and fight your way through, don't stop until you reach the checkpoint. Once get there prepare for a last stand (about 30 seconds or 1 minute in harder game modes). Let the Mounties, beavers, and moose do most of the work, but have guns and chainsaws ready for they can sometimes be overwhelm, especially in O*P*P mode. To avoid having your party die, hug one of the entrances while the guards shield you from the zombies, once the Mecha-Mountie comes crashing down you can breathe a sigh of relief. Once most of the zombies have be annihilated you can then speak to the Prime Minister and precede to the ending epilogue (or you can assassinate him with explosives or fire to get the NICE ONE, HOSER cheevo ).
CONGRATS ON GETTING TO CANADA!!![]


Please don't haunt me.
If this Guide was a big help for you, congrats. If this guide somehow managed to kill you off, I'm sorry, please don't come back as to haunt me. Big thanks to Kepa Auwae of Rocketcat Games, Paul Priham of Madgarden, and everyone else who made this game. Death Road to Canada is an awesome game, where you really don't know what you will encounter on the journey.
Keep on Driving!
ROAAAD TRIIIIP!!!!!!!!